Simple Pet Care Solutions
Welcome To Little Paws Pet Club

Hello and welcome to Little Paws Pet Club! My name is "Little" and I'm the President of Little Paws Pet Club. If you want to be part of our club, just stop in and enjoy all of the free pet information that we share! Be sure to take part in our club by leaving your comments too! Check back often for lots of free pet ideas, pet patterns, healthy pet recipes and more! Thanks for stopping in! Your Little Paws Pet Club President~Little~
~~~~~~~~~~~~~~~~Can't Find Something?~~~~~~~~~~~~~~~
Please Scroll Down To View All Of Our Free Pet Recipes And Ideas!
Please Read This Post Before Continuing

I have created this site as a means to assemble all of my pet information in an organized, fun and easy to reference manor.

Of course I am not a veterinarian, so I can not guarantee the accuracy or safety of any information posted here. Before using any of the information contained in this blog, please consult with a veterinarian to be sure that the recipes, pet toys, patterns or other ideas posted here are appropriate for your pet.

Note: All of the patterns, recipes, information and instructions posted here are my own original writings, thoughts and ideas and are not to be copied for distribution or resale.

I have always loved and owned pets of all kinds. I hope that you enjoy visiting my pet blog and stop back often for lots of fun.

12/1/08

Cute Pet Products!

I wanted to let everyone know about this neat little Etsy shop!

I've seen previews of the adorable pet items that they will be featuring in thier store and trust me, you will want to bookmark this store and watch for the pet items to become available!

Right now they have some unbelievably cute jewelry listed in the shop, and trust me, the pet items that I previewed are even cuter!

Bookmark their store and watch for the pet items! But be fast, because I bookmarked this site too and you'll have to be faster than I am when the pet items are listed, wink! http://www.littlecottageshop.etsy.com/

1/26/07

No Sew Fleece Pet Bed

Hello Again! Little the cat here with another fun project that you can make for your furry little friends! This no sew fleece pet bed is easy to make plus the supplies that you need to put it all together can be found very inexpensively at most discount stores. With a little imagination, you could make these simple, cozy pet beds in lots of different colors and shapes as well. I made this cozy bed for my little friend Bijou who seems to really like it. This is a photo of Bijou demonstrating how cozy these pet beds are.

Here are my step by step instructions!
To get started you will need two pieces of polar fleece that are the same size. For the pet bed that I made, I used two square pieces of polar fleece that were 26 inches square. Remember that you can use this same technique to create a pet bed in different shapes and colors. I am using a simple shape for demonstration purposes. If you decide to make a different shaped pet bed, it may be easier for you to start out by making a simple square pet ped first. Then after you have mastered the technique you may find it easier to make other shapes of pet beds such as hearts or circles.

Once I had my two pieces of polar fleece, I then cut a four inch square from each corner of the two peices. Next I placed the two polar fleece pieces on top of each other evenly and carefully cut 1 inch wide x 4 inch long fringe along each edge. (Be sure that both the top and bottom pieces of polar fleece remain even while cutting your fringe, so that the fringe on both pieces matches up when you are finished cutting.

Once you have your fringe cut, you simply knot the top and bottom pieces of polar fleece together. With the two pieces of polar fleece still laying one on top of the other, Begin at a corner by taking a piece of fringe from the top piece of polar fleece. Then pick up the matching piece of fringe from the bottom piece of polar fleece. Tie them together in a simple double knot. Continue knotting the top and bottom fringe together until you have only one end that is not knotted.

At this point you will want to put some fiber fill in your pet bed to make it nice and soft for your pet. To make your pet bed cozy, only fill it lightly with fiberfill so that it is not packed tight. This will make a much softer bed that your pet can sink into for a comfy fit. If you are making your pet bed for a feline, you could also insert some cat nip inside of it before knotting the end of your pet bed closed.

Well there you have it. A simple, cozy and cute pet bed that you can make to show your pet how much you care. Please be sure that this type of pet bed is appropriate for the pet that it is intended for, before giving it to them. I'm just going to test this pet bed out a bit before I give it to Bijou. I want to make sure that it passes my comfy test. Until next time. Your Little Paws Pet Club President, Little....zzz...

1/2/07

Canned Tuna Can Cause B1 Deficiency In Cats

According to the American Animal Hospital Association, the type of tuna that humans eat contains an enzyme that destroys vitamin B1 in cats. Cats who are fed tuna on a regular basis may develope a vitamin B1 deficiency. Cats who suffer from vitamin B1 deficiency can develope loss of equalibrium, seizures or in severe cases, even death. If you can't resist giving your fabulous feline a human type tuna treat, be sure to limit it to an amount of one can a month or less.

12/28/06

Doggy Donuts Treat Recipe

Here's a fun and easy dog treat that you can make to delight your pampered pooch, Doggy donuts!

Doggy Donuts

Ingredients:
2 Cups whole wheat flour
2/3 Cup beef broth
1 egg, beaten
3 Tablespoons uncooked oatmeal
1 teaspoon garlic powder


Preheat oven to 400°F

Mix flour, egg and broth well in a large bowl. Add oatmeal and garlic powder. Mix until ingredients are evenly distributed. Roll dough to 1/2" thick on a lightly floured surface.

Cut the dough with a donut shaped cookie cutter or use one large and one small circular cookie cutters to create the donut shapes. Carefully place each donut on a lightly greased or non-stick cookie sheet.

Bake 10-15 minutes. Watch to avoid burning. Remove donuts from oven to harden, or turn off oven and leave donuts in oven to harden. If you choose to allow the donuts to harden in the oven watch them to avoid burning.

Doggy Donut Icing Recipe

Note: White chocolate is a typical ingredient in many dog treat icing recipes. White chocolate can safely be given to dogs in small quantities because most of the caffeine in white chocolate has been removed. The main ingredients in white chocolate are cocoa fat, sugar, milk solids, lecithin and vanilla. If you are able to find them, yogurt chips or carob chips have also been used to make a healthier doggy donut icing. Be sure to check with your vet to be sure that any of these ingredients are safe for your pet before using them.

Doggy Donut Icing

1 cup yogurt chips or vanilla white chocolate chips
1/4 teaspoon vegetable oil
1/4 tablespoon of vegetable powder to color the icing
Vegetable Powder Examples:
Pink- beet powder
Green - spinach powder
Yellow - turmeric

Melt vanilla chips in a double boiler. Add vegetable oil and coloring powder. Lightly dip the tops of the donuts in the icing or spread a thin layer of icing on the donuts with a knife. You can also use doggy donut crumbs as sprinkles to decorate the tops of your doggy donuts. Place the donuts on waxed paper to dry.

Wheat Free Dog Treat Recipe

Many dog owners avoid feeding wheat products to thier furry friends because some dogs may experience wheat related allergies or are gluten intolerant. Other dog owners prefer to feed their dogs a wheat free diet because they feed thier pets a natural type of canine diet.

If you are looking for an easy, wheat free snack that you can make for your best freind, this turkey treat recipe is sure to fill your needs as well as your lucky dogs tummy!

Wheat Free Tasty Turkey Treats

1 undrained can of flaked turkey
1 cup of oatmeal
1 cup of yellow cornmeal
1/2 teaspoon garlic powder
1/4 teaspoon baking powder
1/3 cup water

Preheat your oven to 350°F

Use a food processor or blender to mix the turkey, dry ingredients and water until it is well blended. Then remove the mixture and knead by hand until it forms a soft dough.

Roll out dough approximately 1/4" thick. You can lightly dust the rolling surface with cornmeal to prevent sticking when rolling out your dough. Cut into shapes. Bake on a lightly greased or non-stick cookie sheet for 20 to 30 minutes. Be careful to avoid burning the treats.

12/27/06

Heartworm Facts

Little the cat here, Back from my top secret pet health investigation with some important information to share with you about heartworm disease in pets.

The following report has information that is very important to your pets health. I hope that this information will help you to work with your veterinarian to begin an appropriate heartworm disease prevention treatment for your pet.

Heartworms are a form of parasite usually about the diameter of thin spaghetti. Heartworm generally live in the right ventricle of the hosts heart and blood vessels. Heartworm parasites are transmitted from one host to another through mosquitoes. Heartworm parasite infections are diagnosed with a blood test and x-rays. Heartworms may also be detected with antigen blood tests when the heartworms are sexually mature at approximately six months after infecting their host. For an accurate blood test result for heartworm, female worms must be present in the host. Heartworm infections have been diagnosed in every state of the U.S. as well as world wide. Heartworm disease is a very important health concern for our pets. Most veterinarians recommend heartworm prevention medication for dogs as well as cats. It is recommended that dogs over seven months old be tested for heartworm prior to beginning heartworm treatment. Dogs over seven months old who are placed on a heartworm prevention medication may develop severe reactions. Most veterinarians recommend starting puppies on a heartworm preventative medication by the time they are eight weeks old. Most veterinarians recommend having your dog tested for heartworms on a regular basis if they have not been on a regular heartworm prevention program. In cats a single heartworm can cause extreme respiratory symptoms or death. It is believed that many cases of heartworm in cats is overlooked because feline heartworm disease symptoms does not appear the same as heartworm symptoms in dogs, but tends to mimic other cat diseases. Also detecting adult heartworm in cats can be difficult as feline heartworm tests are not totally reliable.

Be sure to ask your veterinarian about a program for pet medications to prevent heartworm disease in your pet. Until next time, Your Little Paws Pet Club President, Little.

12/11/06

Remove Mats Easily From Pets Fur

Hello Everyone! Little the cat here with another great pet tip to make caring for your pet easier.

This is a picture of my buddy Bijou. Bijou is pretty cute in a soft and fluffy kind of way. (I personally prefer more of a smooth and stripey look myself) The problem with Bijou is that she can really get in some tangles! (In more ways than one if you know what I mean!)

Any way, if your pets fur gets tangled or matted, Bijou has an easy tip that will help you to get your little mess straightened out quickly.

Simply sprinkle a little cornstarch on any mats in your pets coat when brushing and this will make them easier to remove. Sprinkle more cornstarch on the mat as you work it out of your pets coat and you should be able to remove the mat in a jiffy!

Happy grooming from Bijou and Your Little Paws Pet Club President, Little

12/10/06

Grapes And Raisins Toxic To Cats And Dogs!

Hello Little Paws Pet Club Members! Little the cat here. Even though I had a little too much fun at the party last night, I thought that it was best that I show up for work today and alert everyone to this important notice!

With the holidays here and everyone in a baking mode, I thought that it would be a good idea to point out a potential health hazard to our cats and dogs that many pet owners are not aware of.

That potential health hazard is grapes and raisins! Grapes and raisins are a very real health threat to your cat or dog if they consume them. Most pet owners are unaware of the fact that grapes and raisins are poisonous to their cats and dogs.

Between January 2001 and August 2004 the animal Poison Clontrol center received more than 200 calls from pet owners seeking help because thier dogs had potentially eaten grapes or raisins and were suffering the diverse affects.

The amount of grapes or raisins that a cat or dog needs to eat before poisoning symptoms develop varies. Some cats and dogs may experience an initial gastrointestinal upset after consuming grapes or raisins. This can potentially be followed by acute renal failure or kidney failure which can be deadly.

After your cat or dog has consumed grapes or raisins, vomitting will often occur within the first few hours. You may notice undigested grapes or raisins in your pets vomit or fecal matter. Other possible symptoms include diarrhea, depression, abdominal pain and excessive thirst.

If you believe that your cat or dog may have consumed grapes or raisins it is important that you seek veterinary care for your pet immidiately. The key to preventing acute renal failure in a cat or dog that has consumed grapes or raisins is early recognition and immidiate veterinary medical attention.

Please remember to keep all holiday treats safely up and away from all of your pets and have a safe and happy holiday season.

12/9/06

Helping Overweight Dogs

If you feel that your dog may be overweight, The first thing that you should do is have your dog checked by a veterinarian. Your veterinarian can tell you if your dog is actually overweight and what your dogs healthy weight range is.

Your veterinarian may also want to check to make sure that your dog is not suffering from any health issues such as hypothyroidism which can cause your dog to gain weight.

How can you tell if your dog may be overweight? Generally with an overweight dog it is difficult to feel your dogs ribs because they have an excess amount of fat covering them. When you look at an overweight dog from the side, the belly generally has minimal or no tuck. An overweight dog viewed from above, generally shows no indendted waistline in the front of the hips.

Keep in mind that these are general rules which can vary between different breeds of dogs. Always have your veterinarian examine your dog to determine if it is actually overweight, and if so, that your pets weight issue is not due to health issues.

If your dog is overweight, check with your veterinarian to see if these tips could help your dog get back into shape.

First, be sure that you are feeding your dog a high quality natural dog food. Some pets may over eat in an attempt to gain their daily required nutrients if they are fed a low quality food.

You may want to consider measuring your pets food each day to prevent your pet from over eating.

Be sure to exercise your dog each day. Even though you have a large yard your dog still may not be getting the exercise that he needs. Be sure to interact and provide physical activity for your dog each day. take him for walks and play games with him to be sure that he is getting the daily exercise and stimulation that he needs.

If your dog is trying to loose weight, be sure to limit his treats to small amounts of low fat healthy treats such as yogurt and cottage cheese or even carrots. Table scraps are a definate no, no for the overweight dog.

Some pet owners believe that they are pampering their dogs when they overfeed them or give them lots of treats, but serious health problems can occur from allowing your dog to become overweight.

Hopefully these tips can help you to determine if your dog may have a weight problem, and if so help you to get your dog back into the 'Grrrr'eat shape that will help him to live a long and healthy life.

12/8/06

Tasty Hamster Treat Recipe!

Hello Everyone! I had a request from one of our Little Paws Pet Club members for some fun hamster ideas and thought that I would start with this tasty hamster treat recipe! This is a fun and easy recipe to make and the ingredients can easily be changed to give your cute little critter lots of treat variety.

Mash some banana in a bowl. Add enough dried whole wheat bread crumbs until you can shape the mixture into tiny balls that are a good size for your hamster to hold. You will want this mixture on the dry side, but still moist enough to shape into little balls. You can also add some finely chopped carrots or apples, ground plain oats, wheat germ or flax seed to your mixture. Refrigerate the balls until you are ready to use them.

You can make endless variations of these hamster treats by using mashed potatoes or any type of baby food that is safe for hamsters as the base of your treats and then incorporating any types of hamster safe finely chopped or ground fruits, veggies, sunflower seeds or dry ingredients into the baby food until it is dry enough to form into balls.

Please note: Before incorparating any ingredients into this recipe, be sure to do some research to be certain that the ingredients that you plan to use are hamster safe. For instance, Peanut butter has been known to cause choking in hamsters as well as get stuck in their cheek pouches and should be avoided.

I hope that your little hammies love this healthy rodent recipe! Until next time. Your Little Paws Pet Club President, Little

12/7/06

Make A Cat Scratching Post

Hello Everyone! Little the Cat here with another fun project just for you! If you are scratching your head over how to keep your cute little kitties claws from scratching your furniture, I have just the project for you!

Today I thought that I would show you how to make a home made scratching post for your friendly feline! It's fun and easy to make your own scratching post for your cat and your cat will be amazed at your talent!

(If you are young, be sure to ask an adult before trying this project. Also, anyone doing this project needs to use caution and observe safety rules when using a staple gun, to avoid injury.)

All you need to complete this fun cat scratching post is a piece of wood, some rope and a staple gun.

I started my cat scratching post with a piece of 1"x4" wood, that was 24 inches long. Then I took a spool of hemp rope and fastened it to the bottom of my board using a staple gun. I made sure to staple my rope on each edge of my board as well as three times across the front and three times across the back of the board along the bottom edge. This secures the bottom edge of your rope so that it wont slide off of your scratching post.

Once the bottom of the rope was secured well to the board, I continued to wrap my rope tightly around my board. After several wraps around the board, I would secure the rope on each side edge with a staple.

I wrapped and stapled my rope to my board until I was approximately 3 1/2" from the top of my borad. At this point I took a sepperate 16" piece of rope and stapled each end of it securely down the unwrapped sides of the scratching post. This makes a hoop of rope at the top of your scratching post so that you can hang it on a door handle if you like.

Once I had my hanging loop securely fastened, I continued to wrap my rope up the board, wrapping it over the hanging loop rope on the sides of the board, until I reached the top of my board.

I secured the rope at the top of the scratching post, the same way that I secured the rope at the bottom. I then rubbed catnip on my scratching post and hung it on my door.

Be sure to check that your rope is secured tightly in all areas of the scratching post and that no staples are loose or sticking out that could injure your cat.

Well there you have it folks. A cheap and easy cat scratching post that you can make for your fluffy little fur ball to enjoy! Like I always say, "Nothin says lovin like a cat toy made with your own loving hands, er a paws. Well, you get the picture." Until next time. Your Little Paws Pet Club President, Little

11/27/06

How To Make A Snuggly Parrot Toy

If you own a parrot, you probbably know how expensive parrot toys can be! Here is a great parrot toy that is easy to make and inexpensive too! This snuggly parrot toy is made of polar fleece which can be purchased inexpensively at most discount department stores. All you need to make this parrot toy is some polar fleece and a pair of scissors! I also added some natural rope to my parrot toy to make it more interesting for my parrot. (small rope is also available at most discount department stores in the hobby section) Adding the natural rope to this toy adds even more interesting textures for my parrot to explore. To make this fun parrot toy, I first cut off about a one yard length of the selvage edge of my polar fleece to use as the center "rope" of the parrot toy. Next I cut two yards of polar fleece into strips approximately 7 or 8 inches wide. You can use two or more different colors of fleece to make a more colorful toy if you like. I then cut the polar fleece strips into smaller pieces approximately 2 by 8 inches wide. Once I cut the polar fleece strips into smaller pieces, I tied a double knot in one end of the selvage "rope." After knotting the end of the selvage, I simply tied each of the smaller strips of polar fleece onto the longer "rope."I tied each 2 by 8 inch piece of polar fleece onto my fleece "rope" with a single knot and secured it tightly. After attatching each of the smaller pieces of polar fleece to the "rope," be sure to push them down snuggly towards the knotted end.Between every two peices of fleece that I attatched to the center fleece "rope" I tied on a 12 inch piece of natural rope which I double knotted and then pushed snuggly toward the knotted end of the fleece "rope."I continued tying the fleece strip and the natural rope pieces onto my fleece "rope" until I had made my parrot toy the length that I wanted.I used the unfinished end of my fleece "rope" to tie my new snuggly parrot toy tight against the top wire of my parrots cage. I then cut off the overhanging remaining "rope." My Blue and Gold Macaw loves his suggly toy! He plays with it all day and at night he even pulls it under his feet and snuggles up with it to sleep!

11/23/06

Beta Fish Care Basics

The Beta Fish, also known as the Siamese Fighting Fish, is a popular, beautiful and inexpensive pet. It's hard to resist these stunning little jewels!

Beta fish are considered to be a relatively easy pet to own, but keep in mind that beta fish do have specific requirements to keep them comfortable, safe and healthy. Here are some beta fish basics to get you started.

The Beta fish's official name is Betta splendens. These beautiful little fish generally have a lifespan of two to three years. The Beta fish's natural coloring was orginally much more drab than the intense colors that we see in pet shops today. Also in the wild the original beta fish sported much shorter fins. The Beta fish originated in the hot, humid rice paddies of Asia.

The Beta Fish developed a way to breathe oxygen directly from the air, using a lung-like "labyrinth" organ to survive as the rice paddies experienced drought. This way the bettas could still get air, while living in muddy, shrinking water holes and could survive until the rains returned.

Beta fish do not actually enjoy existing in tiny containers. Even though it's possible for Beta fish to survive in these harsh conditions, this ability was developed by the Beta fish as a means of survival rather than choice. It's much kinder to house your Beta fish in a 2.5 gallon tank or larger.

While it's not necessary to house your Beta fish in a 10 gallon fish tank, it is much more comfortable and your Beta fish will appreciate it. A larger fish tank, such as a ten gallon tank, will also provide you with a fun way to display your prized Beta by adding plantings and other appropriate touches to your fish tank.

Because the Beta originated in a warm climate, Betas do not enjoy being cold. Your Beta will most likely consider your home's room temperature too cold. We suggest investing in an inexpensive aquarium thermometer. A stick-on thermometer will do. You may want to consider placing a small heater in your Beta tank or placing your Beta's bowl in a warm area of your home. Your beta will sit clamped and lifeless in a huddle near the bottom of his tank when he is too cold. Beta's enjoy a water temperature in the mid 70 degrees.

The beta fish is commonly called the Samurai Fighting Fish because male Beta fish will attack each other and fight to the death. Never house male beta fish together. We also do not recommend placing a female Beta fish with your male Beta fish. It is very likely that your male beta will attack the female Beta as well, or possibly harrass her to death.

Be aware that Beta fish are not recommended for community tanks. In a community tank the other fish will most likely nip at your Beta fish's long beautiful fins and injure them. If you do decide that you want some companion fish with your Beta, be sure to research which species will coexist peacefully before placing the other fish with your Beta.

Your Beta fish needs only 3 or 4 grains of food eash day. It's best to feed your betta one grain of food at a time, several times a day. A Betas stomach is about the size of their eyeball. Too much food will give your Beta bloating pains, constipation, and possibly swim bladder issues (which is often deadly). Feed your Beta fish only special fish food made for bettas.

Betta fish are beautiful and interesting fish to own. Beta fish are intelligent and will quickly learn who their caregiver is. You will notice that your Beta fish will soon learn when you approach and become very excited! If you give your Beta fish the attention and care that he deserves, you will be rewarded with a stunning and intersting pet that is a pleasure to own.

11/22/06

Pet Safety During The Holidays

This article was contributed by Little Paws Pet Club Member Nicole V....... Nicole is an 'Expert Canine Stylist' and owner of Pampered Pups Grooming Parlour in Selah, Wa.

The holidays can be a very stressful and dangerous time for your family's pets. Be sure to keep all seasonal goodies up and out of your pets reach and be very careful in regard to the type and placement of decorations you put up in your home.

Poinsettias, holly, mistletoe and lilies are all poinsonous if eaten by your pets and Christmastree water may contain fertilizers and bacteria so your pets should never be allowed access to it.

Care should be taken to use screens on fireplaces and candles should only be burned where they won't be knocked over by a curious cat or exuberant dog.

Also, although tastey, tablescraps do NOT make healthy treats for pets and should be avoided, especially chocolate, alcohol, bones and turkey. Providing your pet with a quiet place to go to escape all the extra activity is thoughtful and kind.

Know that if you are planning to bring a new critter into your home this holiday season it's best to wait until after your household has settled down and can really focus on making your new family member feel welcome and secure.

Don't forget that there are COUNTLESS critters of all kinds out there just waiting to be adopted and www.PetFinder.com is a great place to start your search for a new best friend!

Please Don't Litter. Spay or Neuter Your Pets!

11/20/06

Remove Pet Urine Odor With Natural Ingredients

"Ooo ooo that smell... can't you smell that smell... ooo ooo that
smell... that smell that surrounds yooooou..." Oh, Uh, Uhemm, uh, Hi there. "Little" here. Your Little Paws Pet Club President.

Today I thought that I would talk about natural ways to eliminate pet odors and stains.

There are several methods touted as effective means for removing pet stains and urine odors using natural household ingredients. Some natural pet odor remover recipes sell online for up to $10. Now you can save your money because I've listed several natural pet odor remover recipes here that are proven to be effective.

Be sure to do a patch test in an inconspicuous area before using these suggestions.

Also be sure to blot the area as dry as possible before using these methods.

Corn Starch
Working corn starch on the area and then vacuuming draws out the urine and there is no lingering smell.

Mouth Wash
Lister*** mouth wash will remove urine odors. Dilute with two parts water and spray or pour it on the problem area and let it sit for several hours. Then place a stack of newspaper on top to soak up the excess liquid. Vacuum when you remove the newspapers. The mouthwash smell will be gone within a couple of days.

Hydrogen Peroxide
You might want to try hydrogen peroxide. Be sure to test a small spot first to make sure it doesn't remove color. Pour it on, work it in a bit and let it dry.

Baking Soda
Sprinkle baking soda on the affected area and leave it to absorb overnight. The next day, vacuume up the first batch of baking soda. Pour another dry batch of baking soda on the carpet, and using a wet cloth, rub the creamy wet mixture into the area. Next rinse the mixture with clean water. Vacuume well when the area is dry.

Baking Soda, Water, Vinegar
Create a baking soda and water paste. Rub it into the area and apply distilled white vinegar over it. Blot this up with clean white towels, and repeat it no more than two times. Follow that with a good rinsing of water, blotting up the moisture. It will smell like vinegar for a short time, but the urine smell should not come back.

Wintergreen Scented Rubbing Alcohol
Use wintergreen scented rubbing alcohol from a dollar store. Splash it on the area. It dries fast and doesn't have to be rinsed. The smell of the wintergreen disappears in a few days. This also works for cat urine as well. It's a cheap and effective fix!

General Carpet Deodorizing
For general deodorizing, you can also try sprinkling this baking soda recipe on carpeting monthly, or as needed, before going to bed and let it set overnight. Vacuum the next day.
1/2 cup baking soda
1/2 cup cornstarch
15 drops of your favorite essential oil fragrance


We would love to have you share your natural methods for removing pet odors and stains as well. You can share your methods at the end of this post in the comments section. Thanks for sharing!

11/19/06

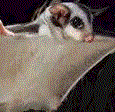
Sugar Glider Facts

It's a bird!...It's a plane!...It's comin right at me! Yikes!

Hello Everyone! Here is some great information about those cute little critters-sugar gliders!

If you have been thinking about getting a great small pet that is friendly, fun and entertaining then you should consider a sugar glider! Here is some great information about these cute little critters.

Sugar Gliders are marsupials which means that the babies are born extremely immature and then grow in a pouch on the mothers abdomen until they are mature enough to survive outside her body on their own.

The adult sugar gliders size is usually around 5-6 inches long with a weight of 4-6 ounces.

Between the wrist and the ankle, sugar gliders have a fur covered membrane called a patapium. By spreading out thier hands and feet the sugar gliders patapium acts like a parachute allowing the sugar glider to float through the air.

Sugar gliders have large apposable toes on their hind feet which allows them to grip branches. This assists the sugar glider while gliding from limb to limb and while climbing. Sugar gliders second and third toes form a grooming comb which they can use to groom their fur.

Sugar gliders are extremely social and enjoy companionship. Because of this fact sugar gliders usually bond well with their owners. If you do not have a lot of time to spend with your sugar glider it is a good idea to keep more than one.

If you plan on keeping more than one sugar glider it is advisable to raise them together from a young age as it can be difficult introducing unaquainted adults.

Be sure to purchase an appropriate cage for your sugar glider. It is best to get the largest cage that you can afford to give your sugar gliders plenty of room.

Before purchasing a sugar glider as a pet, be sure to research their nutritional needs. Sugar gliders have some special dietary calcium requirements that are important to follow to keep your sugar glider in optimum health.

Sugar gliders are nocturnal animals, so if you plan on owning a sugar glider be prepared to have a pet that is most active during the night. Sugar gliders make a chainsaw like sound, so you may want to place their cage in an area where their talking does not disturb you while you sleep.

In spite of the fact that sugar gliders are nocturnal, they are usually happy to spend time with their owners during the day by sleeping in a pocket or pouch. Many sugar glider owners find this trait particularly charming and take their little sugar glider pocket pets with them everywhere they go.

We'd love to hear your comments on these little flying fur balls! Let us know what you think by clicking on comments below! Till next time. Your Little Paws Pet Club President, Little

Fun Ferret Facts

Hello Again Everyone!

Here are some Fun Ferret Facts! I hope that you enjoy learning about these funny little fur balls!

~The average lifespan of a ferret is 6-8 years.
~Female ferrets are called "jills", male ferrets are called "hobs", baby ferrets are called "kits" and a group of ferrets is called a "business of ferrets".
~Female ferrets are usually around 13 or 14 inches long and weigh approximately 2lb.
~Male ferrets are usually 15 or 16 inches long and weigh approximately 3lb.
~Male ferrets can reach 4lb. or more if not neutered.
~Ferrets sold in North America are usually spayed or neutered as well as decented before being sold.
~Ferrets generally sleep around 18 hours per day. THey tend to be most active at dawn or dusk, but can adapt the sleeping habits of their owners.
~Ferrets have poor eyesight, but posess a sharp sense of hearing and smell.
~Ferrets are friendly, playful,inquisative and fun to watch.
~Ferrets produce a distincly musky odor, which is generally not considered offensive. This odor is produced by their skin glands and is present even when a ferret has been descented.

If you would like to share your fun ferret facts, click on comments below. We'd love to hear them! Until next time. Your Little Paws Pet Club President, Little

Potty Training Puppies

Hi there! Little here with some puppy potty training tips.

Feeding your puppy at regular times each day will make his or her bathroom schdule regular as well. Most puppies need to be fed several times each day.

immidaiately after your puppy finishes eating, take him to his designated potty area. Use a command such as "Go potty" once your puppy is in the proper location. You should repeat this command as your puppy is going potty. Always offer praise to your puppy when he has finished going potty in the potty area.

By repeating the command during the action, you are helping your puppy to associate the command "go potty" whith his action. Once your puppy understands this command it will be helpful when you take your puppy to different locations. This will let your puppy understand the proper locations where he is allowed to go potty.

I hope that you found these puppy potty training tips helpful. (If not, you may want to check out the article above on how to remove pet stains and odor with natural ingredients.) Remember to click on comments to share your puppy potty training tips! Until next time. Your Little Paws Pet Club President, Little

Guinea Pig Exersice Ball Warning!

Even though many of the exercise balls sold in pet sotres come with a photo of a guinea pig on the box, they should not be used for guinea pigs! A Guinea Pigs spine curves in the opposite direction of the inside of an exercise ball. Also a Guinea pigs spine is not very flexable. Placing a Guinea Pig in an exercise ball that is too small can cause injury to a Guinea Pigs back and feet.

11/18/06

Outdoor Cat Play Enclosure

Hello again! I wanted to let everyone know about my neat outdoor cat play enclosure!

I took this picture of my friend Jasmine enjoying some refreshing outdoor fun.

We used to have a screened in porch where we could play at our old house. Our current home is in the woods so my mom and dad built a chain link dog run onto the side of our house for us to play in.

My mom and dad reinforced the ground around the run with flagstone and covered the larger openings in the run with wire netting so that no dogs, racoons, mountain lions, etc could get in. My mom and dad even included the chain link roof for more protection, and then added a solid roof on top of that so we can go outside if it rains or snows.

My dad built platforms in the dogrun at all different levels with bridges from one platform to the other platform for our us to climb on. Then my mom hung some cat toys from the roof of the dog run for more fun.

Mom and dad even built a kitty door to the run so that we can go in and out as we please. It's a little cat paradise! We just love it!

You could even build something like this on a much smaller scale with cheaper materials if wild animals were not an issue where you live.

I hope that this idea inspires everyone to pamper thier cute kitties with a safe and fun outdoor play area. You can share your great pet play area ideas by clicking on comments below!

Until next time. Your Little Paws Pet Club President, Little

11/17/06

Overweight Pets And Pet Obesity

Hello Everyone. Today I thought that I would discuss overweight and obese pets. In case you are not familiar with what an obese pet looks like, my good friend Chubbs has agreed to demonstrate.

As you can see, Chubs looks cute and cuddly in a rolly poly kinda way. Chicks dig Chubbs and he also makes a great conversation starter at parties . You can even use Chubbs as a furry bean bag chair if you run short on seating.

Many pet owners think that there is no harm in owning an obese pet and like the attention that their porky pets attract. In fact it is estimated that almost half of all pets are overweight or obese.

The problem with allowing your cute critters to turn into portly pets is that they can suffer the same problems as humans that are overweight. Can you imagine the strain on an obese pets joints trying to lug all that extra weight around? How about the extra work that their heart and organs go through to function?

Okay, I think you get it. So, what's the solution? First have your pet examined by a veterinarian. Your veterinarian will be able to tell you the proper weight range for your pet as well as give you some advice to help your porky pet get back into shape.

As for my friend, Tubby Chubby, his veterinarian suggested feeding chubbs a very healthy, all natural, high protein cat food and measuring out his servings. Chubb's vet also recommended placing chubbs food in a location that would force Chubbs to climb or get some exercise, but not in a spot that was too difficult for my balooning buddy to get to due to his enormous condition.

I hope that this information has helped to make you aware of what a "huge" problem obesity has become with our pets. I have to go put Chubbs lunch on the roof now. Until next time, Your Little Paws Pet Club President, Little...Oh, and don't forget to share your comments below!

11/16/06

Sweet Potatoe Nut Balls

I got this recipe from my friend Soc who is a Blue and Gold Macaw. I'm not sure if they are called nut balls because there are nuts in them, or if they are named after Soc. Tee Hee! Soc says that most parrots really love this recipe! Soc also told me that you can add any other ingredients to this recipe that your feathered friend likes such as oatmeal, raisins, coconut, fruits, vegetables, peanut butter, Spaghetti and meatballs...Ooops, not spaghetti and meatballs (my mistake). This natural bird recipe looks Tasty! Give it a try for your feathered nut ball.

Sweet Potatoe Nut Balls
1 large sweet potato cooked until soft
1/4 cup chopped walnuts
1/4 cup raisins
1 mashed banana
1 cup fresh or frozen mixed vegetables
1 cup diced apples
1 1/2 cup uncooked oatmeal, corn flakes or granola cereal
unsweetened fruit juice

In a large bowl mix together all of the ingredients with enough unsweetened fruit juice to be able to form the mixture into small balls. Place the sweet potatoe nut balls in a closed container and store in freezer. Defrost before serving.

I hope that your feathered friends enjoy this recipe! Got a great parrot recipe? Share it in the comments below! Until next time! Your Little Paws Pet Club President, Little

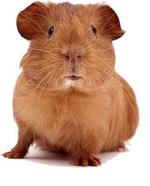
I Was Thinking About Getting A Guinea Pig...

I was thinking about getting a pet guinea pig so I dicided to share some of my research here for everyone to enjoy. (What... you never heard of a cat owning a guinea pig before?)

While doing my research I found out that Guinea Pigs are about half as big as I am so I probably wont be getting one, even though they are cute critters.

The Guinea pigs average size is around two pounds. Most guinea pigs live from five to seven years. Guinea pigs come in lots of color variations from brown, spotted, black, banded to pure golden or white.

Guinea Pigs are rodents with short legs and a plump body. (Sounds like someone I know)

The three most common type of guinea pigs are the smooth-coated with short, glossy fur, the Abyssinian, with fluffy hair tufts and the Peruvian, with long silky hair that flows to the ground. (Wow, they are really into their hair!)

Guinea pigs are social animals so if you keep two or more females together, they will be great friends. (Yeah, great, as long as they don't intend to barrow my hair products!) Adult males tend to fight so it is best to choose females if you intend to keep more than one guinea pig in a single inclosure.

Well, there you have it. Sounds like guinea pigs are all around great pets. Even though they may not be smart enough to own their own website, I personally wouldn't mind being friends with one. Till Next Time. Your Little Paws Pet Club President, Little

Easy Pet Gift Idea

Here' an easy pet gift idea that you can make in a snap! Simply fill a pet dish that is appropriate for the type of pet who will be the recipient with healthy pet snacks. Set the dish on top of a sheet of clear gift wrapping. Gather the gift wrap and tie it at the top with curling ribbon. This is a cute gift that even the most pampered pet is sure to find "tasteful".

I Woke Up Early To Bring You This Cookie Recipe!

Hello Everyone! I woke up early today at 11:45AM because I was excited to share this great recipe with you!

Happy Cat Cookies
1 1/4 C. whole-wheat flour
1/4 C. soy flour
1/4 C. water
1 egg
2 T. wheat germ
2 T. molasses
2 T. margarine
1 t. organic catnip
Preheat oven to 350°F.
In a large mixing bowl, stir together the flours, liquid, egg, wheat germ, molasses, margarine and catnip.
Lightly flour a rolling pin. Roll out the batter on a greased cookie sheet. Cut into 1/2-inch pieces. Bake 20 to 22 minutes.
Allow to cool before serving. Store the leftovers in an airtight container in a cool place.

Please Note: It is not advisable to give catnip to young kittens. If you prefer, you may omit the catnip from this recipe.

I hope that these tasty cookies put a smile on your finicky felines face!

See you next time! Your Little Paws Pet Club President, Little.